Begin: Saturday Sept 14 at 1 PM CDT – During Enid, OK Hamfest!
End: Sunday Sept 15 at 10 PM CDT
My call for this contest is N5ZY/R
ARRL Sept VHF Contest: https://www.arrl.org/september-vhf

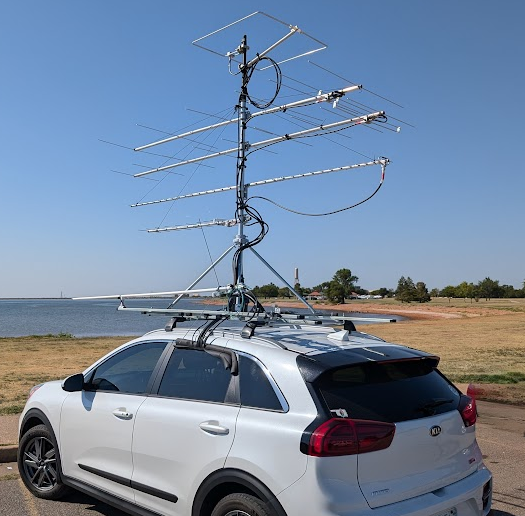
After what has been a painful year I am excited to start this contest with some new kit!
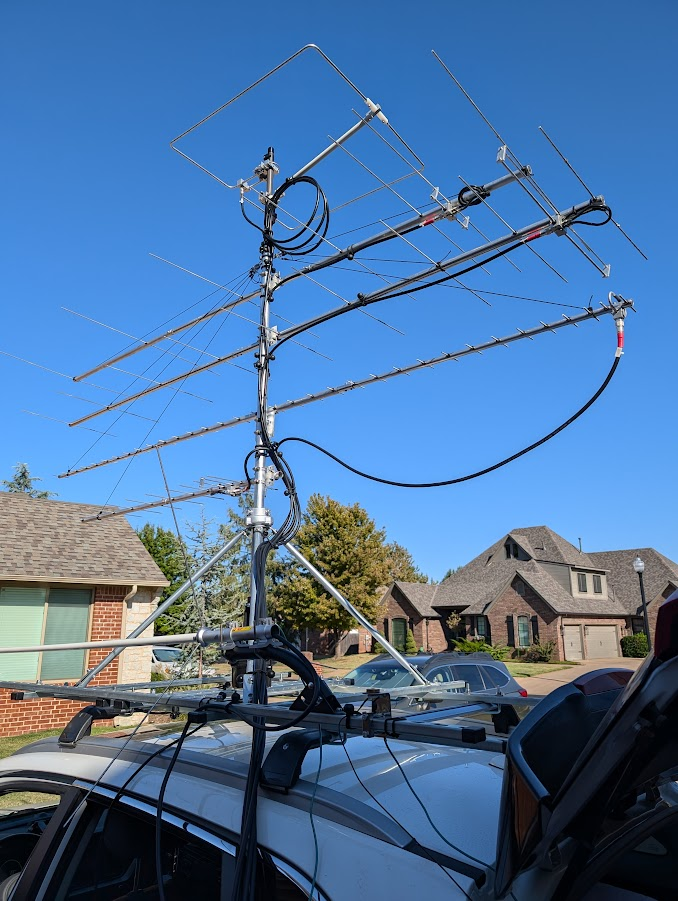
Antennas from top to bottom: 6m loop, 2m yagi, 1.25m yagi, 23cm yagi, 70 cm yagi all from M2.
Also laying down is a Comet Vertical for 23cm/70cm/2m
Goal
I have not been on the radio much at all since mom told us she had cancer. After nearly a year I am truly out of practice. I was glad I remembered how to connect everything and power it on! My goal for this trip was to get away from thinking about mom’s estate and just go have a couple days of fun – and to finish the rotor build I had started this time a year ago. Mission accomplished.
After Contest summary
I finished the brute-force redesign and no longer have the PVC ladder to hold the antennas. I now have a rotor and within the rotor mast is 3 sections of a carbon fiber push-up mast. While parked, this will allow me to push the 6m loop up where it really wants to be for a proper take-off angle. The collapsed clearance remained at just under 13 ft so I can still drive on any highway.
I drove just under 700 miles this weekend and as expected I was not able to keep up with the schedule. I left Enid late as my first contact suddenly made me aware that my logging program was not working like it was the day before.
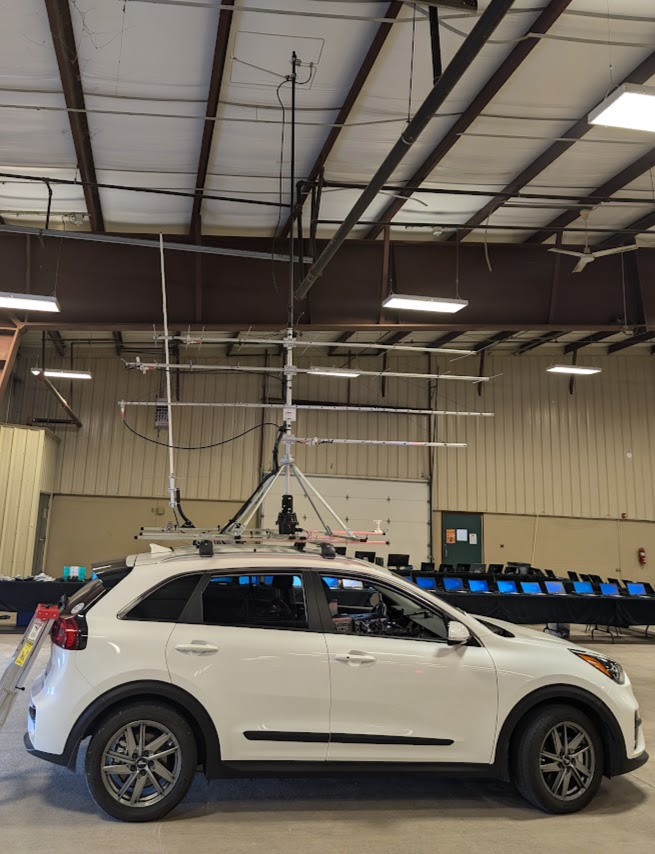
At the Enid Hamfest Saturday morning they invited me to drive the car in for show-and-tell inside the building which was nice. I brought 100 flyers with me to promote other VHF activity and I think I came home with 99 of them. The majority of the attendees there were older hams not new technicians. My day started full of errors. First I drove to the old hamfest location. Then I found that logging from a 3rd radio is not possible (SO2R is it’s max as a stand-alone station). Also, N1MM updated and reconfigured/reset my contest to a fixed instead grid instead of rover. I was hopeful I had encountered all the problems and got them out of the way early. Furthermore I had QRM on 6m that was S5 to S8 which took me until Saturday night to find. My only other delay was passers-by wanting to know what I’m doing which delays the schedule, especially since I like to tell them about Amateur Radio.
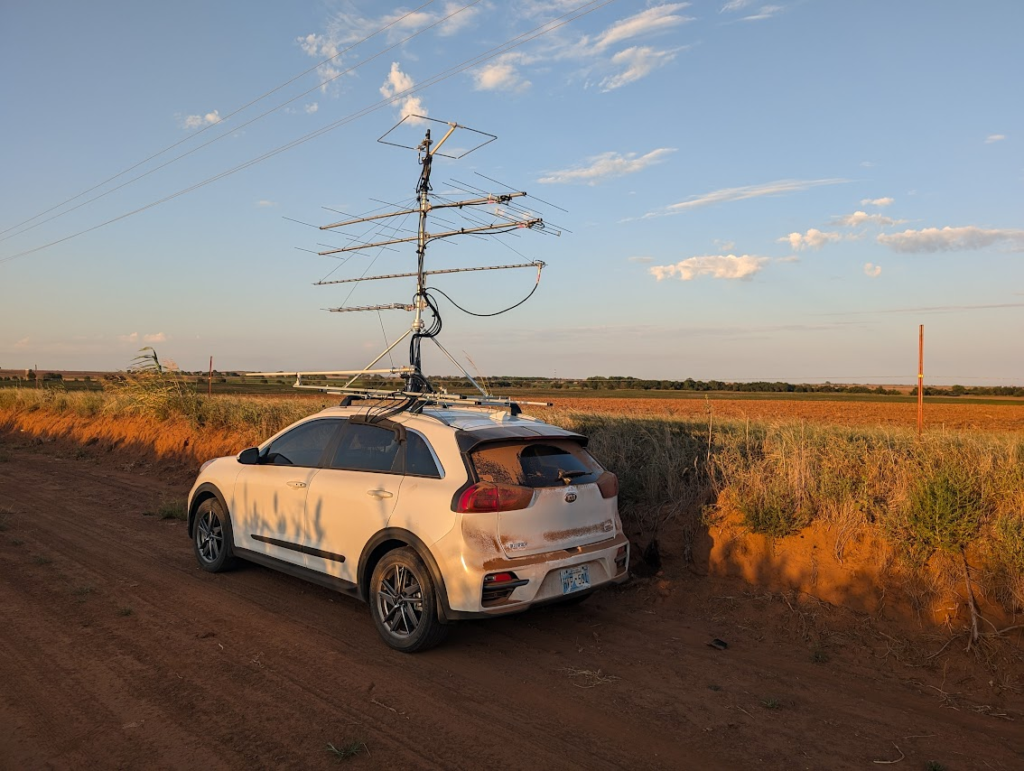
After Enid I drove North and took a few more photos.
Here is a photo from a dirt road in Kansas
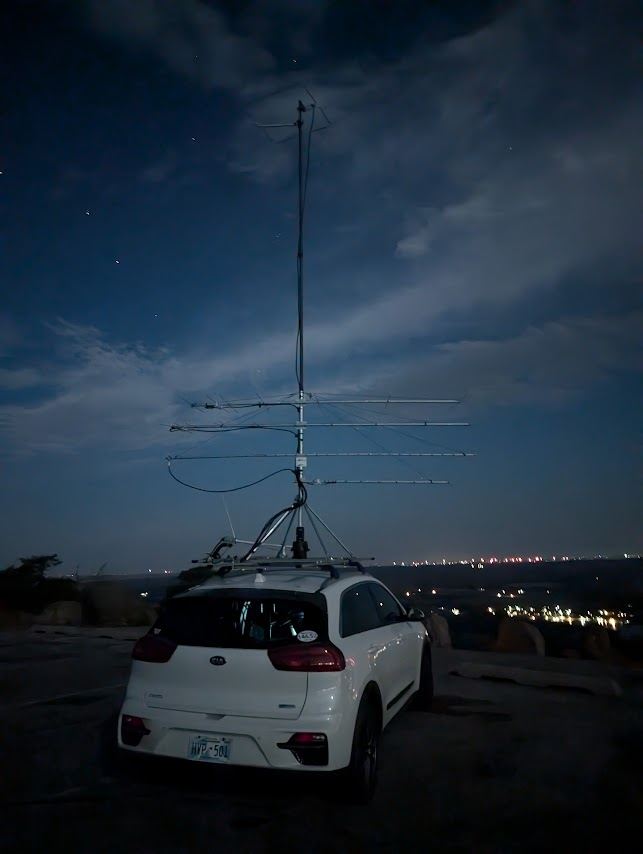
And one more photo from the top of Mount Scott Sunday night.
Results
Lousy. I didn’t decode many 6m contacts this time. One reason was for the first day on 6m I had accidently left a LiFePO4 battery charger connected to the spare battery in the back floorboard directly behind me. I spent an hour during the trip trying unsuccessfully to find the cause of the S5 to S8 noise on 6m… That night when I parked at a hotel for a few hours sleep and began pulling things out of the car, I found it. Sunday morning I didn’t arrive at Turkey Mountain for the 6m opening as I had planned so again missed opportunities. This is what happens when I’m rushed and do not really have a plan and borderline exhausted. I did activate a number of grids but my agenda was way off. As an operator I found myself really tired and therefore forgetting a lot and the distractions only depend my confusion.
| Grid | QSO Count | Note |
| EM04 | 10 | Mount Scott Sunday night after dark. |
| EM05 | 5 | Anadarko, also Sunday night |
| EM06 | 7 | Saturday evening |
| EM07 | 8 | Kansas Grid corner |
| EM17 | 7 | Kansas Grid corner |
| EM15 | 10 | Tulsa Grid corner |
| EM16 | 18 | Tulsa Grid corner |
| EM25 | 3 | Tulsa Grid corner |
| EM26 | 30 | Tulsa Grid corner (Turkey Mnt) |
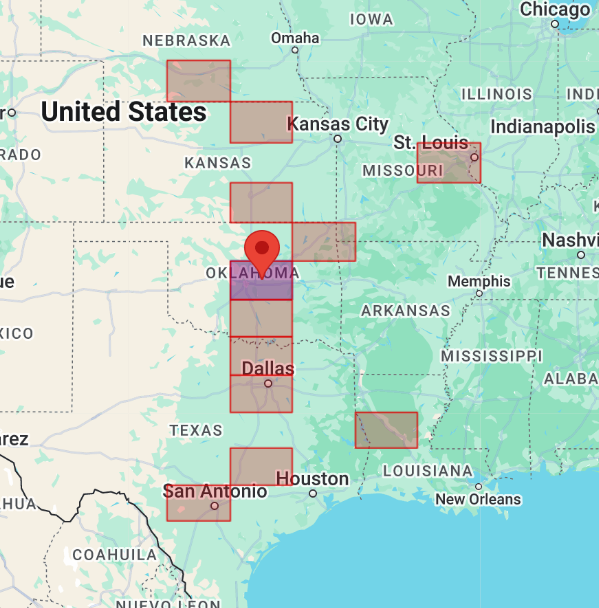
Endpoints reached
On 6m my furthest reach was 1,300 miles in FN25.
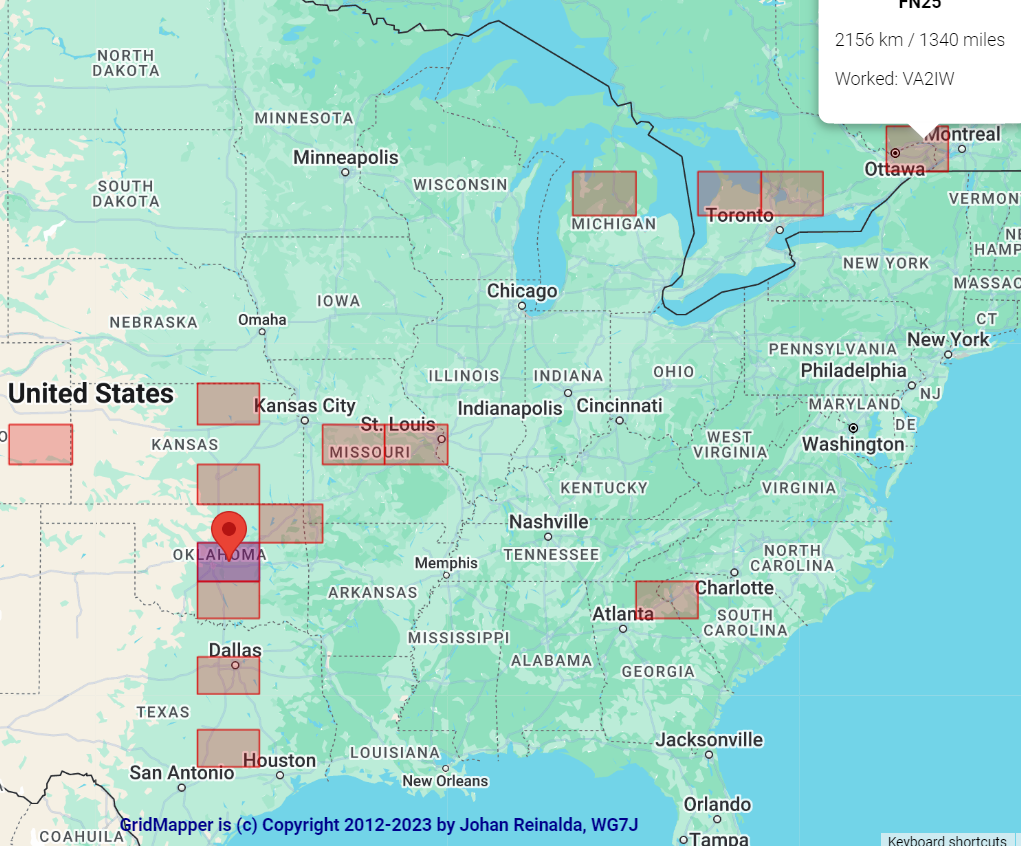
On 2m and up it was much closer in as expected. I cannot explain the straight line..
Cockpit
These photos were the final arrangement of the gear just before I disassembled. The equipment now is on wire shelves as you can see.
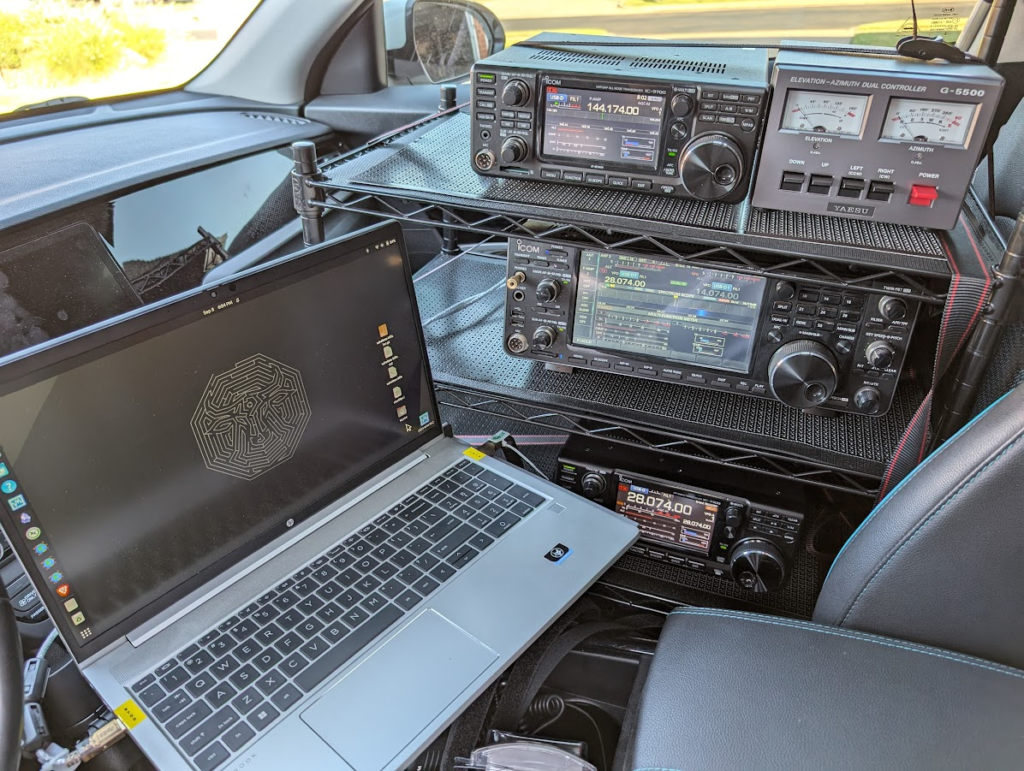
On the top is the rotor controller and IC9700. Next is the IC7610 for 6m. Below that is a IC9300 on 10 meters to connect to the 222 MHz transverter (in back seat). In the floorboard is the 100 AH LiFePo4 battery and a 3,000 watt DC/AC inverter (I got it cheap).
If you’re wondering, each shelf has a 6 ft strap going around the equipment on the shelf and through the shelf. Then each shelf also has a strap on the seat side holding it down in the seat. I used straps around below the seat rails and through the seat bottom/back seam to loop these straps through. This prevented the rack from rocking side to side and from moving forward. It kept the equipment in place.
I covered the wire shelves with a thin metal and I covered that with the toolbox drawer non-slip liner.
To protect the seat from being punctured I used a piece of PVC pipe over the back two legs. I also laid a small towel in the seat underneath the PVC pipe.

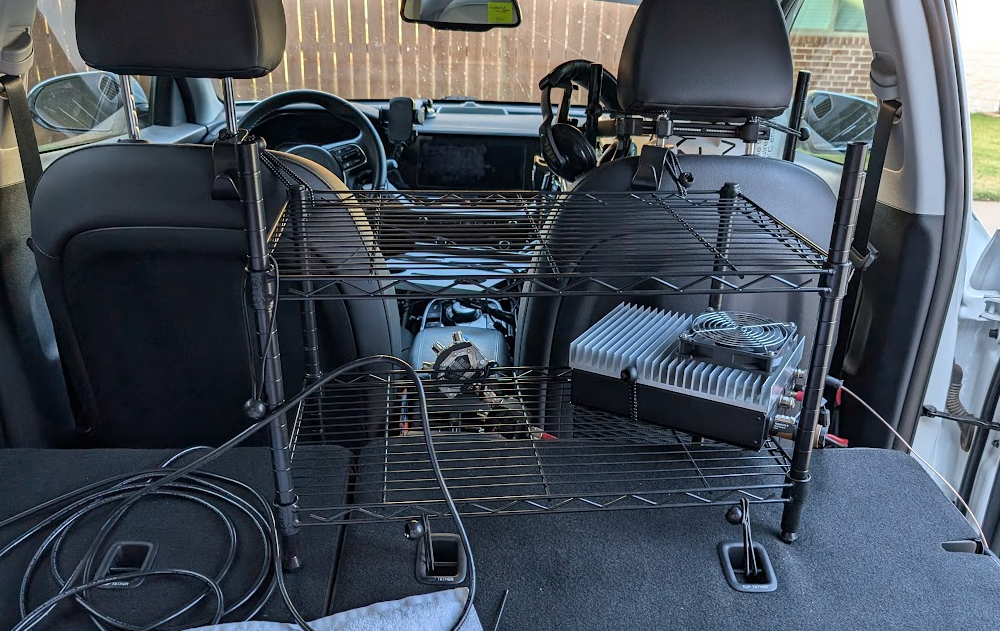
In the back seat I have another wire rack. Here you can see the 222 MHz transverter and the two manual coax switches zip-tied to the front of the rack. To keep the rack in position in the back seat I simply used a few bungi-ball cords around the seat headrest and the folded down back seat tie-points.
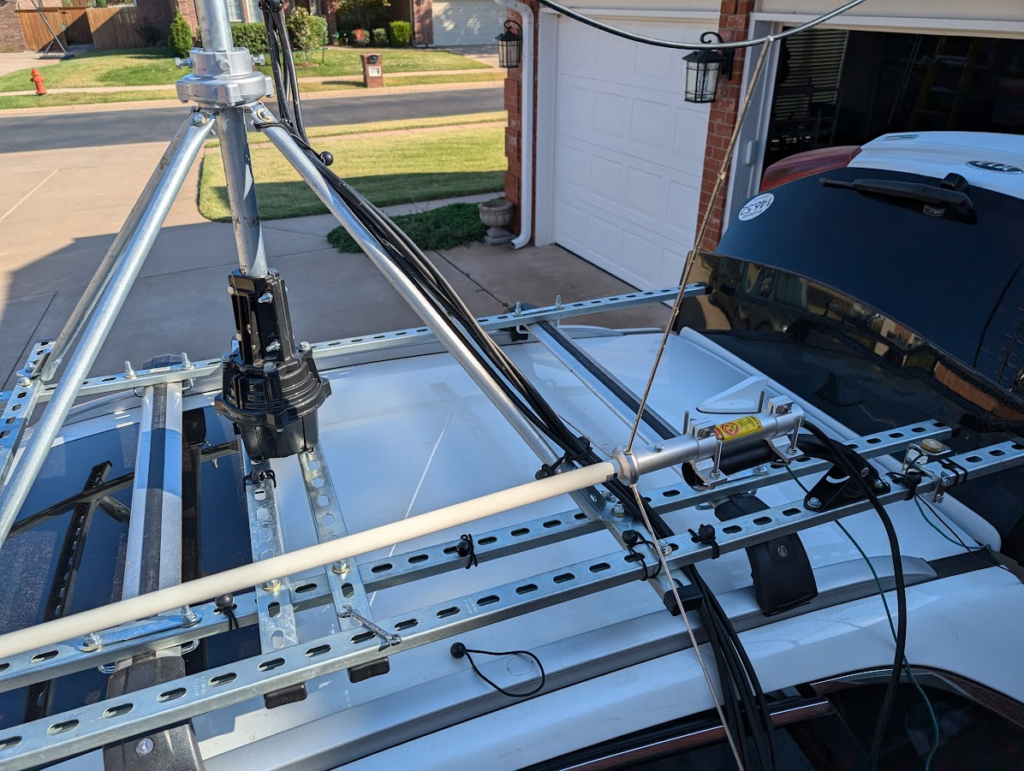
Roof rack
Monday morning when I began to disassemble I found that the roof rack itself wasn’t as attached to the car as it was originally. Therefore in future outings I will be re-using the roof strap as a precaution. I will also now be more aware to the ‘squeek-squeek-squeek’ noise that became noticeable Sunday afternoon. This photo gives you a good idea of how I built it.
The steel base is the ‘Super Channel’ found on the Electrical isle of your hardware store. This stuff is super strong for the weight because of the rolled lips and rectangle shape. All the holes are also very helpful although they do require using large bolts and hardened washers. I use Nylon keeper nuts on everything.
The mast bearing support are 1-1/4 conduit tube.
The mast bearing itself is the smaller Yaesu Rotator Mast Bearings GS-050.
The mast is also electrical conduit. I need to reconfirm the size..
For the antenna clamps, I removed the original pipe clamps and instead used hose clamps. The pipe clamps pinched the mast onto the inner carbon fiber mast preventing it from being extendable. The hose clamps did not cause this problem.
Yes, I would use a ladder to get onto the roof of the car to raise the 6m loop. This is not a good solution if it’s wet… I may create a Youtube of this for a better explanation.
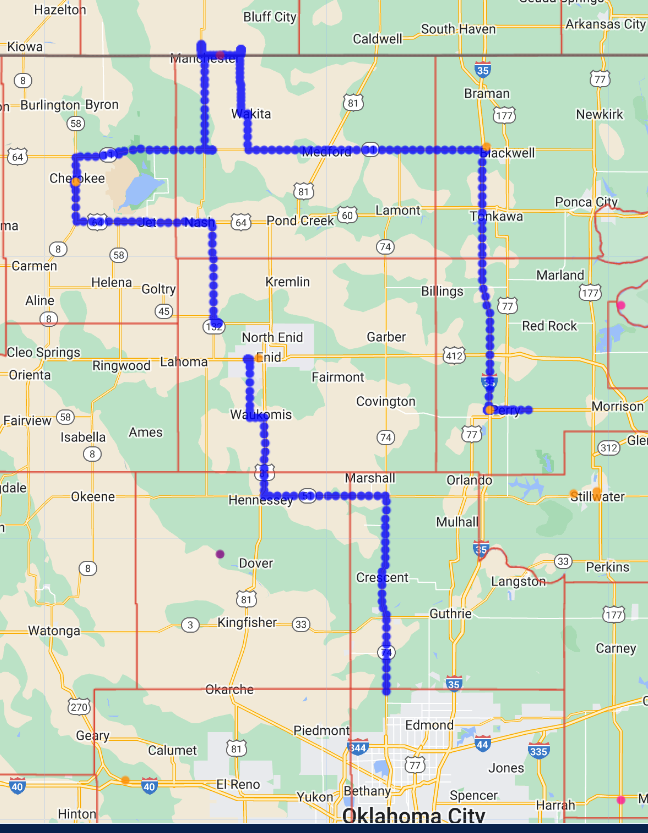
GPS Logging
This time I logged my trip with a GPS Logger and then plotted the points on the Randy Majors County map. For Saturday I spent most of the day at the Enid Hamfest, EM16. Then I went West to EM06, then North to EM07 (paved road into Kansas). I then fell back to Oklahoma and drove East several miles before turning North again into EM17 (many miles of dirt roads). I then returned to Oklahoma into EM16 and drove as far as Perry before checking into a hotel.
This link should take you to the real map: N5ZY/R Sept VHF Saturday
NOTE: The maps below with County lines are from Randy Majors Maps, https://www.randymajors.org/
Using their maps with my GPS data allows me to determine which LoTW cert to sign a contact with and include the appropriate county.
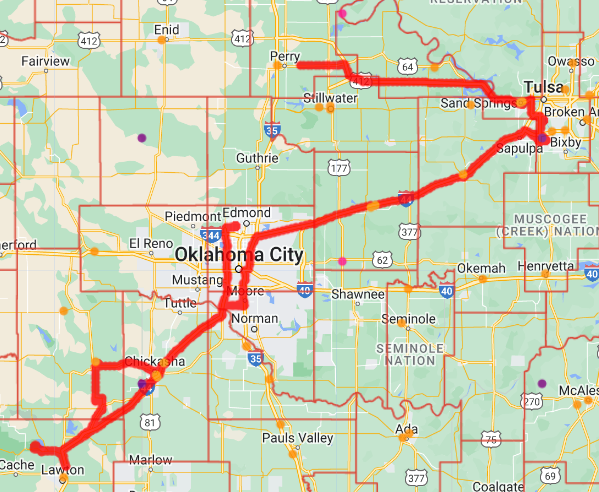
Sunday I drove to Tulsa to operate in EM26, EM25, EM15 and EM16. Then I needed to make the decision of driving to Missouri and Arkansas (but I wasn’t sure where), or driving to Mount Scott. I went with what I knew – Mount Scott. On the way to Mount Scott (EM04) I went through Anadarko for EM05.
This link should take you to the real map: N5ZY/R Sept VHF Sunday
Real-time location on APRS
https://aprs.fi/#!z=11&call=a%2FN5ZY&timerange=21600&tail=21600
If I’m not beaconing my position, you might call/text me and ask me to check my APRSdroid.
Saturday schedule, beginning at Enid Hamfest