Turning My Car Into a Radio Tower (Without Losing My Mind)
Ever wanted to turn your car into a rolling radio station? Me too. But unlike those fancy trailer rigs or TV Van rigs you see at hamfests, I wanted something I could build, install, and (most importantly) remove without recruiting a small army. Oh, and it had to stay under 13 feet tall—because apparently, low overpasses and low tree limbs exist. Another goal was for it to be multipurpose, so when not operating as N5ZY/R I could use it for satellite ops in the back yard. Thus the “N5ZY Rover Roof Rack v2” was created!
So, I set out to upgrade from my trusty PVC pipe antenna mount to a rotor and mast setup. Here’s how it went, complete with tools, trials, and the occasional facepalm moment.
Why I ditched PVC for Steel
Over time I was annoyed with how often a ‘pull-off’ spot on the road did not accommodate a variety of angles. I would have to find a parking lot, not just a farmer’s field entry drive/gate. I also wanted a rotor to do satellite work and I’m a big fan of multi-purpose solutions. Also on occasion my PVC rack would pull apart at a PVC joint, or I didn’t get a twist into a cargo strap and the noise on the highway would be intolerable. Eventually I developed a concept of what I wanted to do that was multipurpose – it can go in the back yard for satellite work or on the car for a rover weekend. Also I wanted a structure that was strong but not heavy and to have the lowest wind profile I could devise.
Vehicle Roof
I’ve never owned a vehicle with roof rack rails so I had some learning to do. Also I had never noticed the endless variety of types of roof rails car manufacturers have developed. My roof rack rails rely on a small lip and a compression grip below that. Before I began I checked the vehicle owners manual for the roof rack load limit – not something I would want to ignore! For my Kia Niro EV, it is 300 lbs. Next I went shopping for roof rack cross bars that could hold at least 200 lbs. Then I had the platform to build upon.
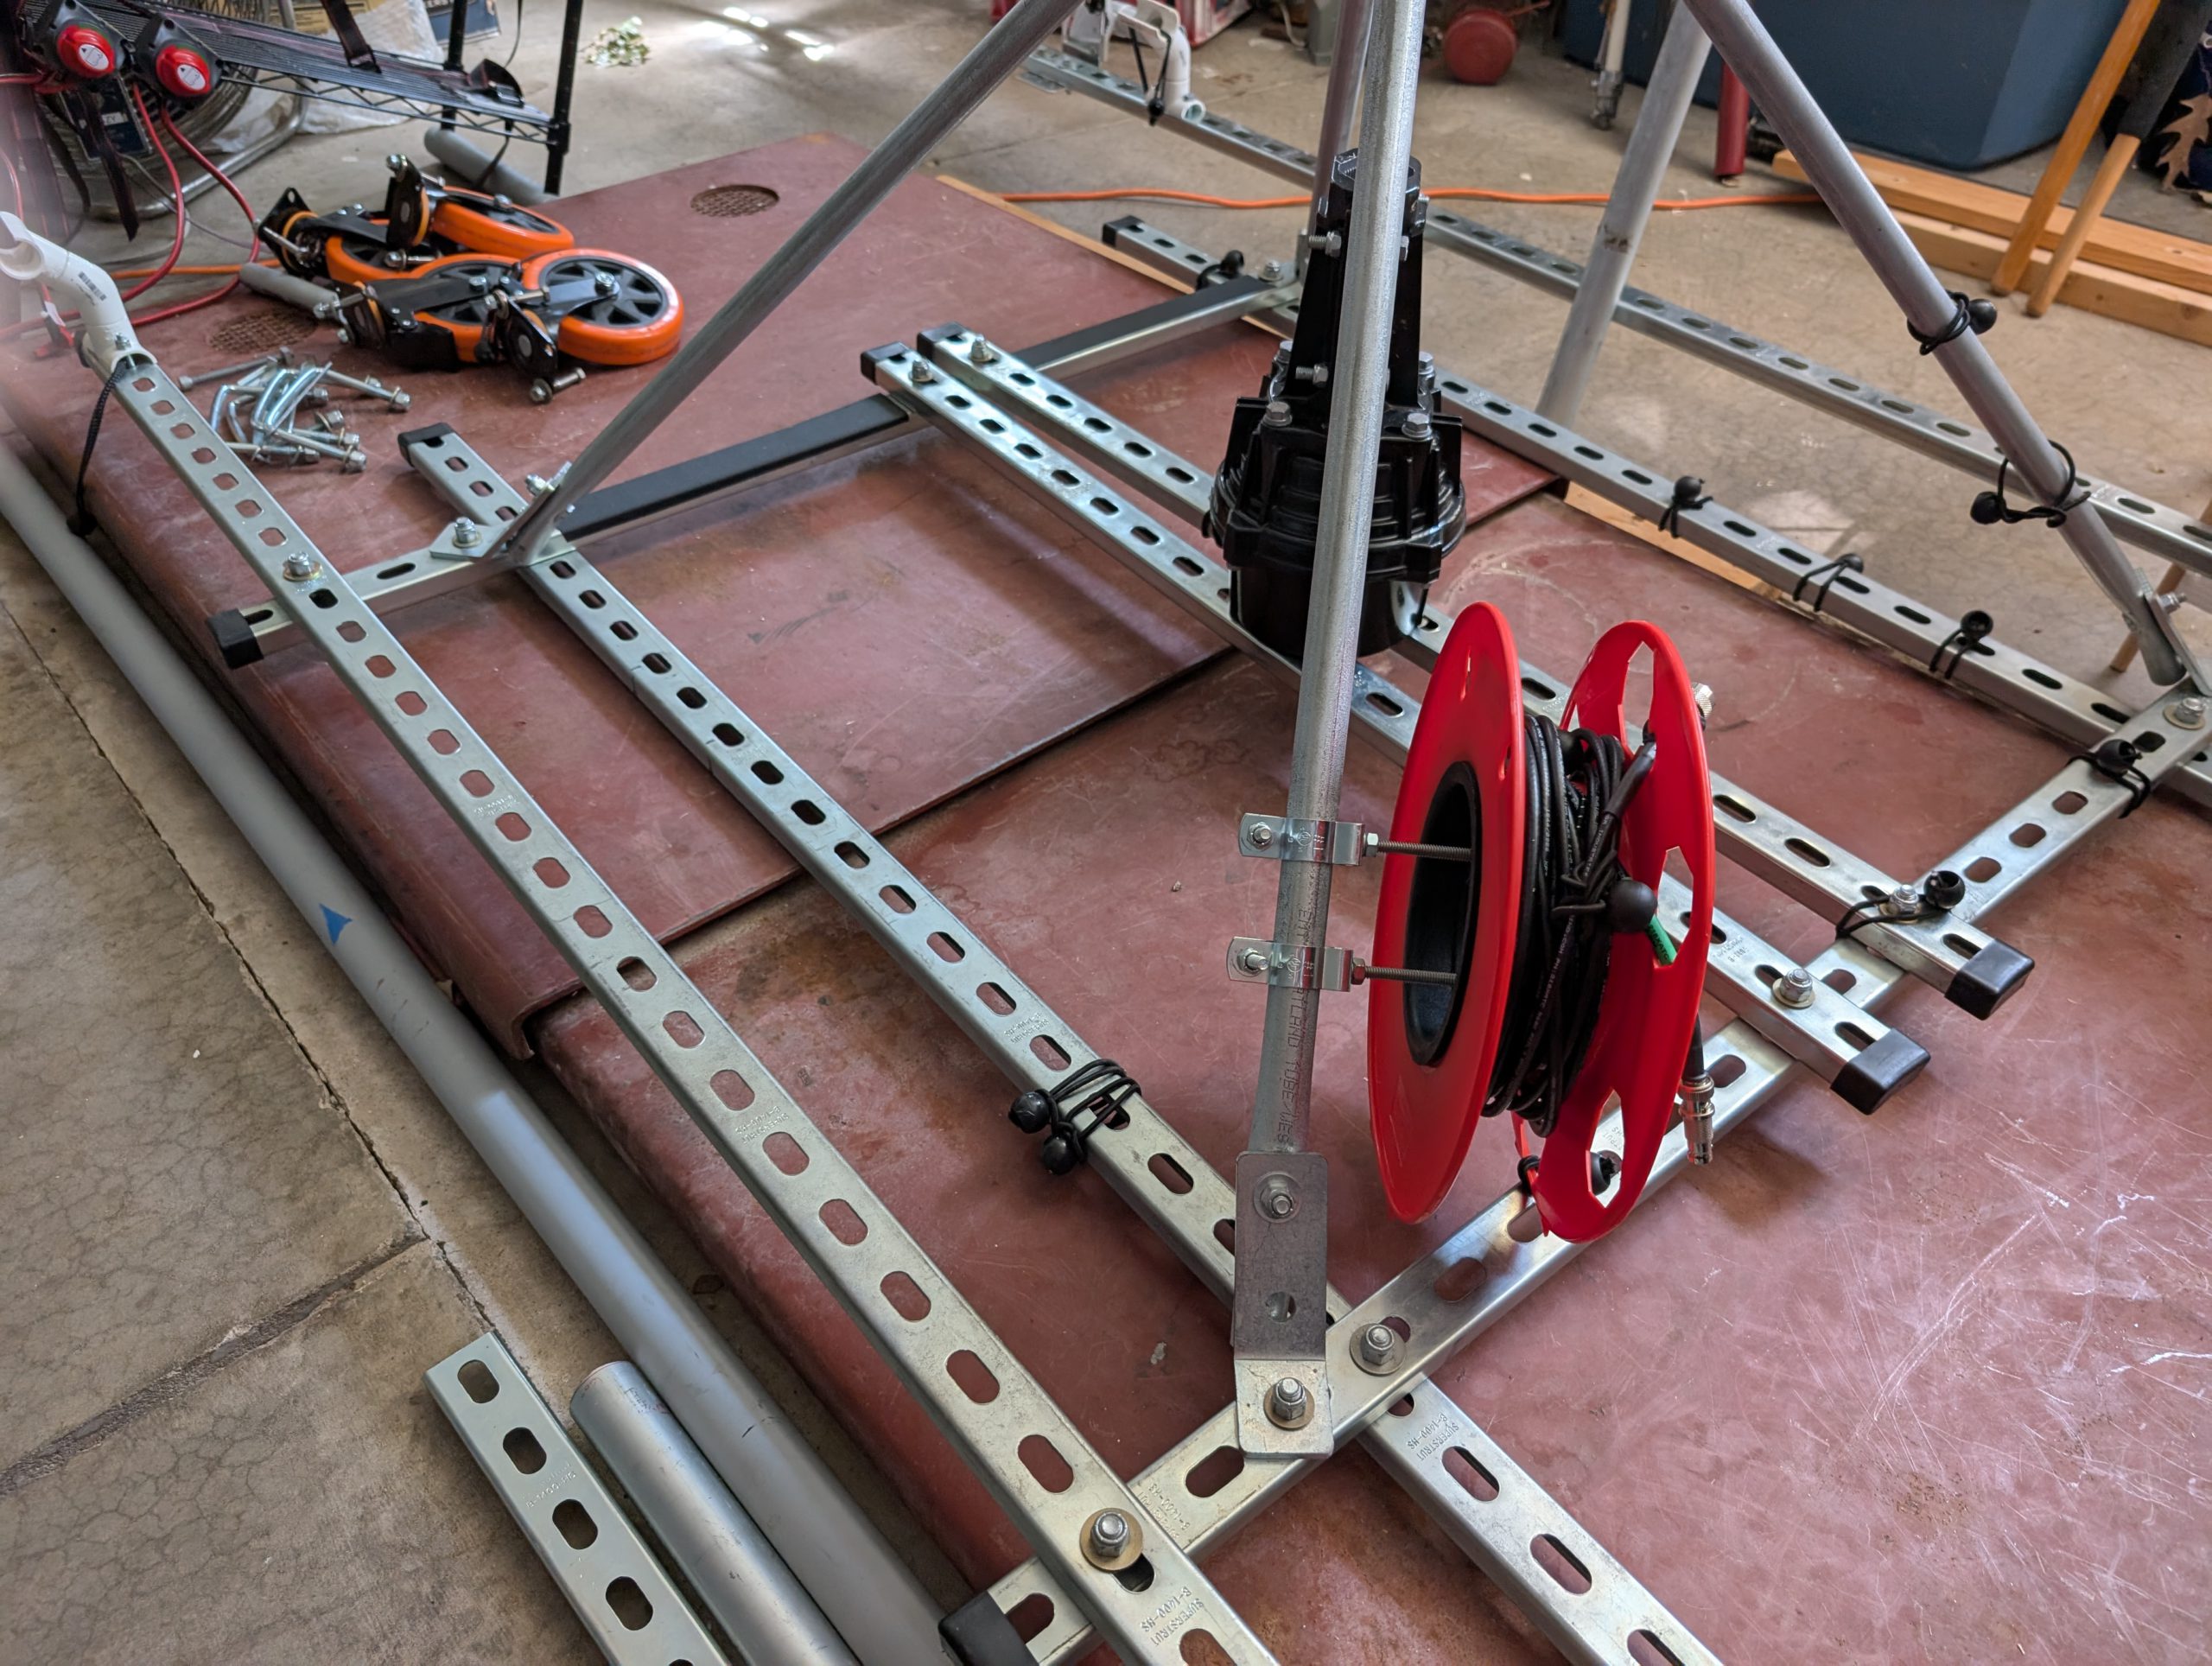
I decided to use the structural steel that electricians use. It’s available in nearly all hardware stores. It’s very strong since it’s rectangular with a curled lip. It’s a single 14-Gauge 10-ft long steel frame with a silver-galvanized finish with several holes built-in for bolting together.
Why I chose the 14-Gauge 13/16-in depth channel vs the 12-Gauge 1-5/8 in depth (both are 1-5/8 in wide):
- Shorter bolts = lower cost
- Less steel = considerably less weight, easier to handle solo
- Lower profile = fewer bridge/tree clearance issues
Base (The Great Roof Rack Hunt and many, many trips to Home Depot)
The Superstrut holes will accommodate 1/2-in bolts but again that’s a lot of unnecessary weight in a full system. I chose 3/8-in bolts and 3/8-in Grade 8 hardened steel, yellow dichromate zinc plated flat washers on both sides. This allows a lot of torque to hold the struts together without fear of breaking the bolts yet not allowing too much slack between the bolt and the bolt holes. For nuts I try to use Stainless Steel Nylon Lock Nuts.
Tools of the Trade (and My New Best Friends)
To cut the steel I use a reciprocating saw. I use a Dewalt 20-volt ‘Max’ variable speed cordless reciprocating saw (really great at sawing small tree limbs too!) and a Dewalt 20-volt ‘Max’ ratchet which is damn convenient for assembly/disassembly – especially if it’s on the side of the highway. The ratchet, which has a 3/8-in and 1/2-in swappable drive has been one of the most handy tools. If I ever have another dog I may have to name it “Dewalt” after this ratchet!
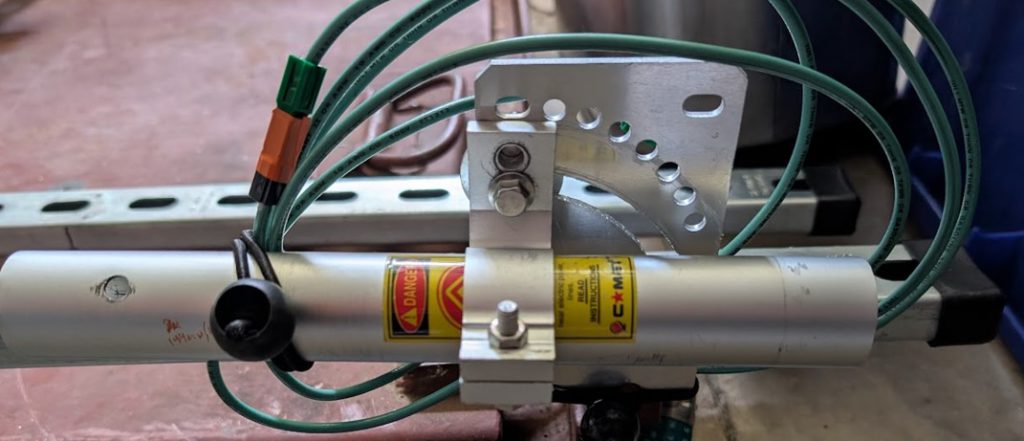
Rotor & Mast Bearing
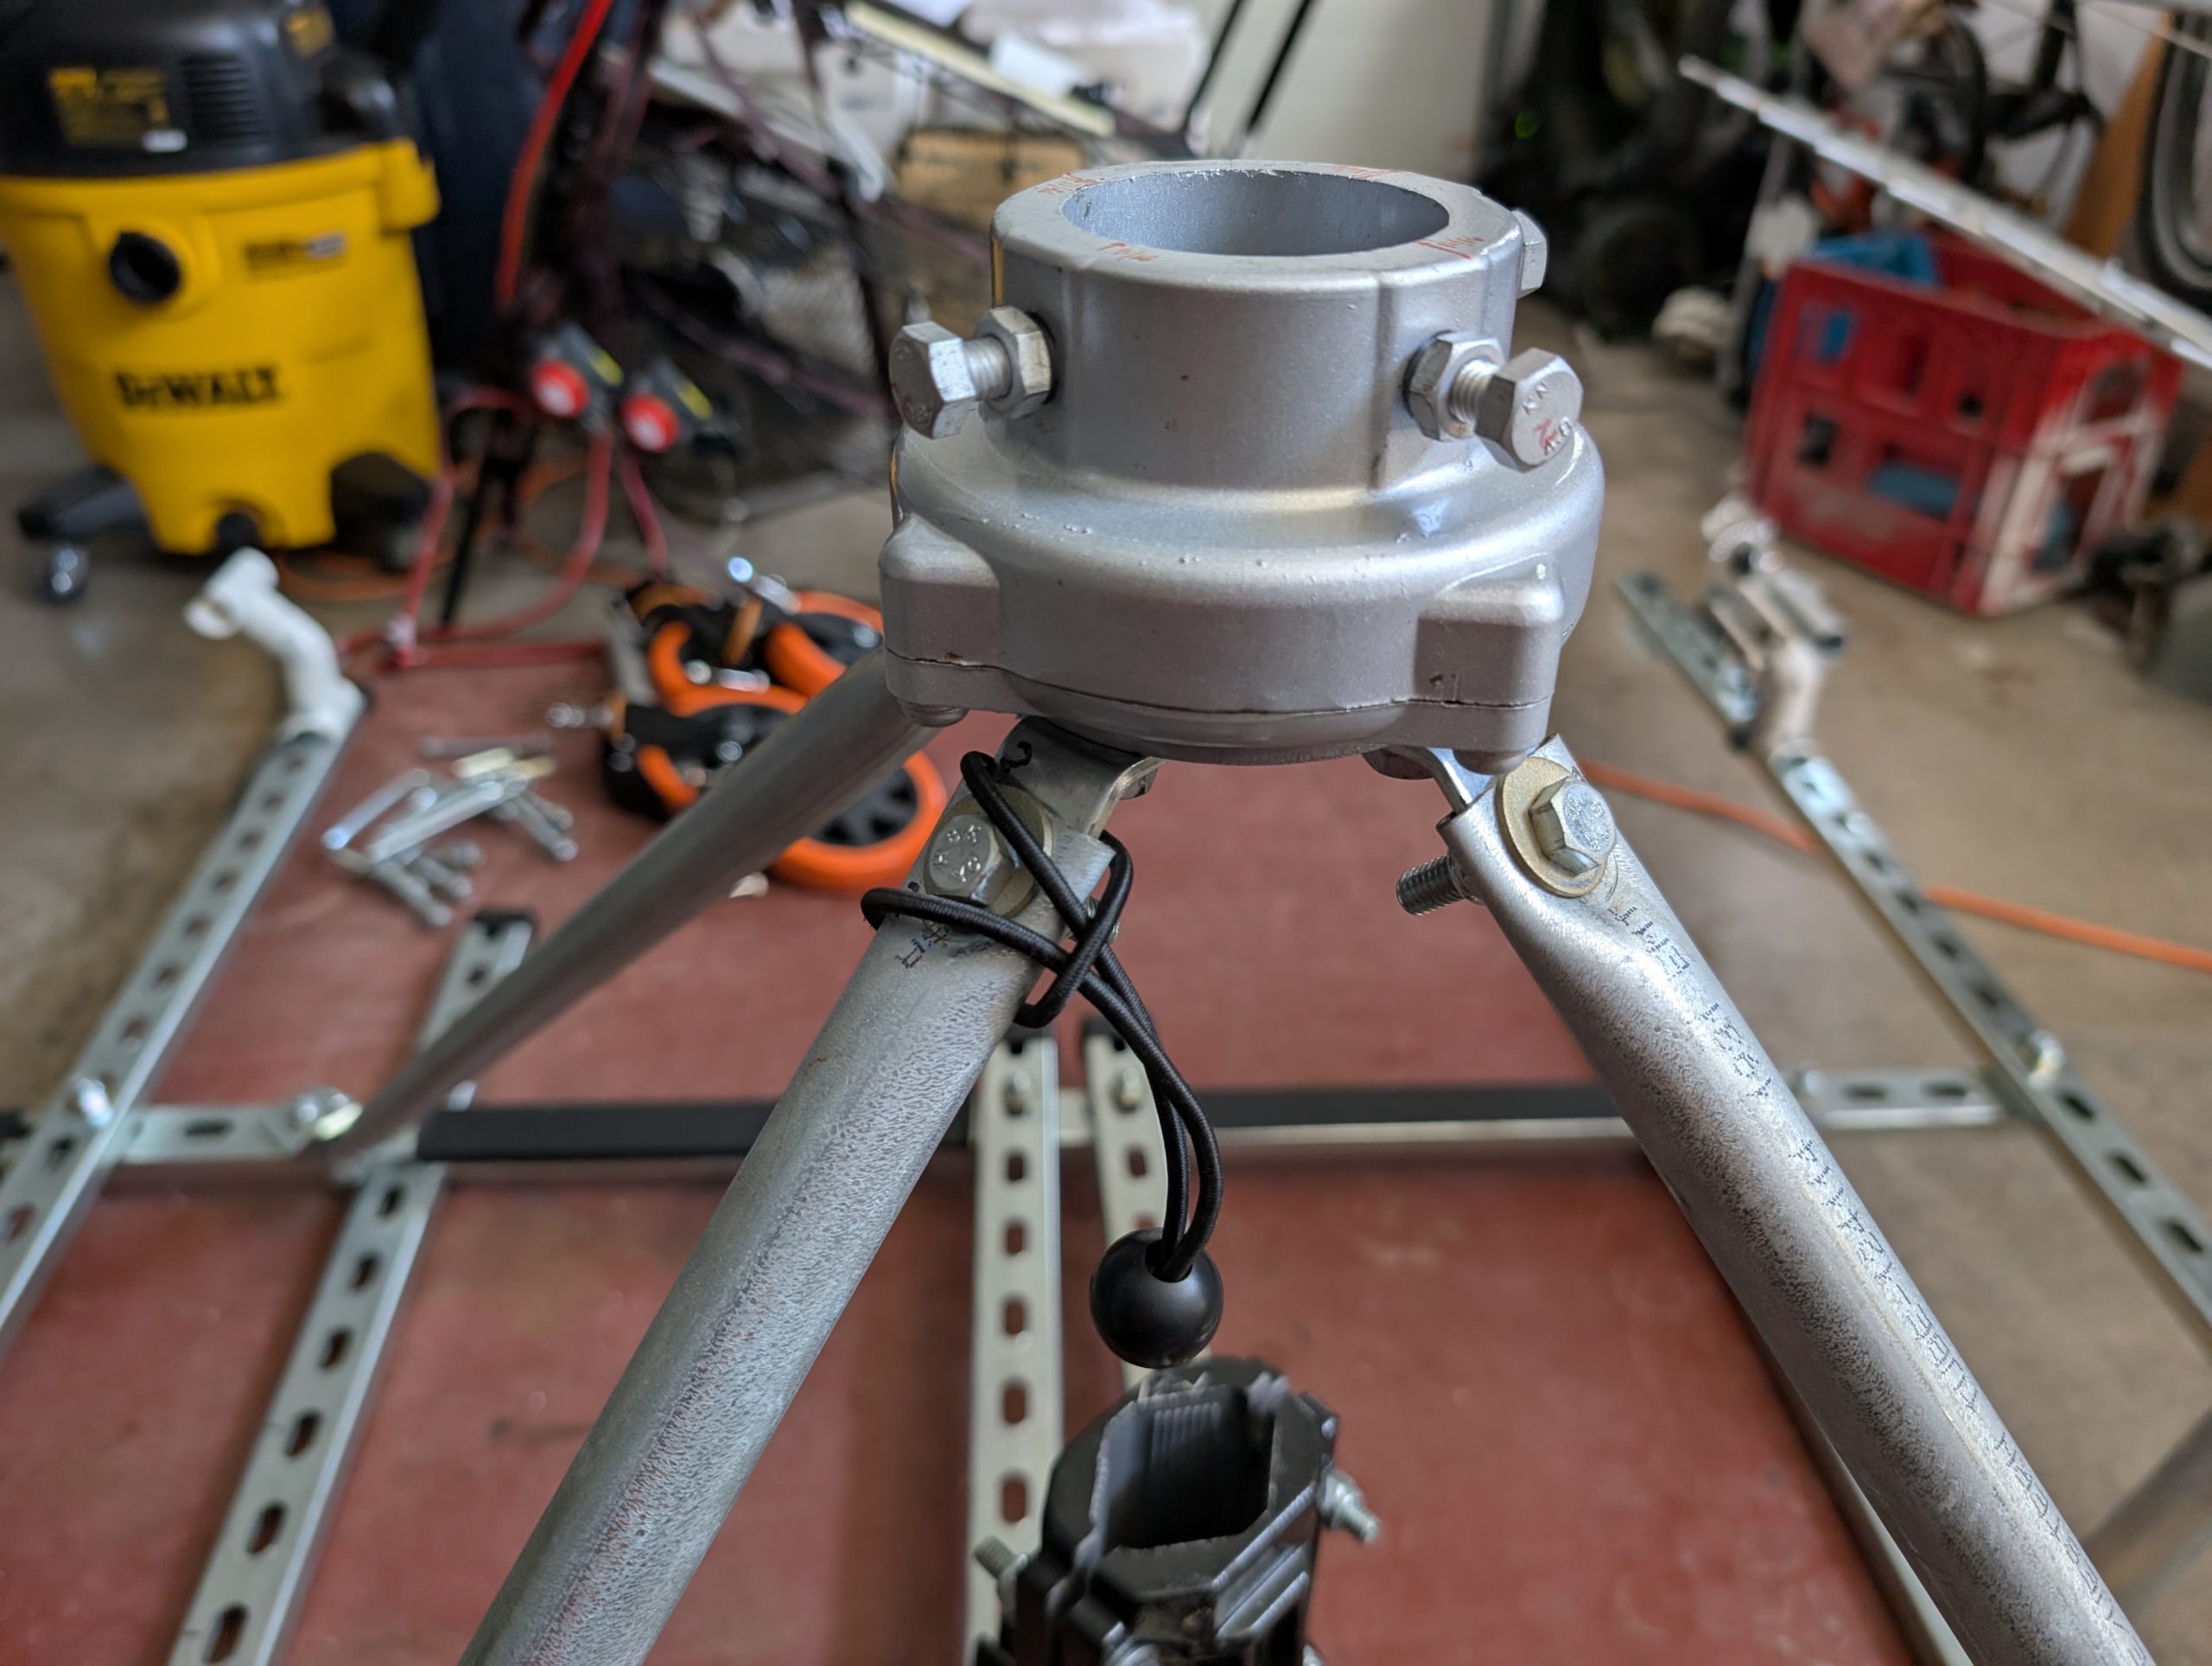
The hardest part to source was the 1-5/8 in x 45 degree angle brackets from the superstrut to the mast bearing support legs. I found the brackets on Amazon. The connecting support legs between this 45-deg bracket and the rotor bearing is 3/4-in steel conduit. To flatten out the conduit ends I used a bench vise to crush it.
The rotor mast bearing itself is the Yaesu GS-050. The rotor is the Yaesu G-5500DC.
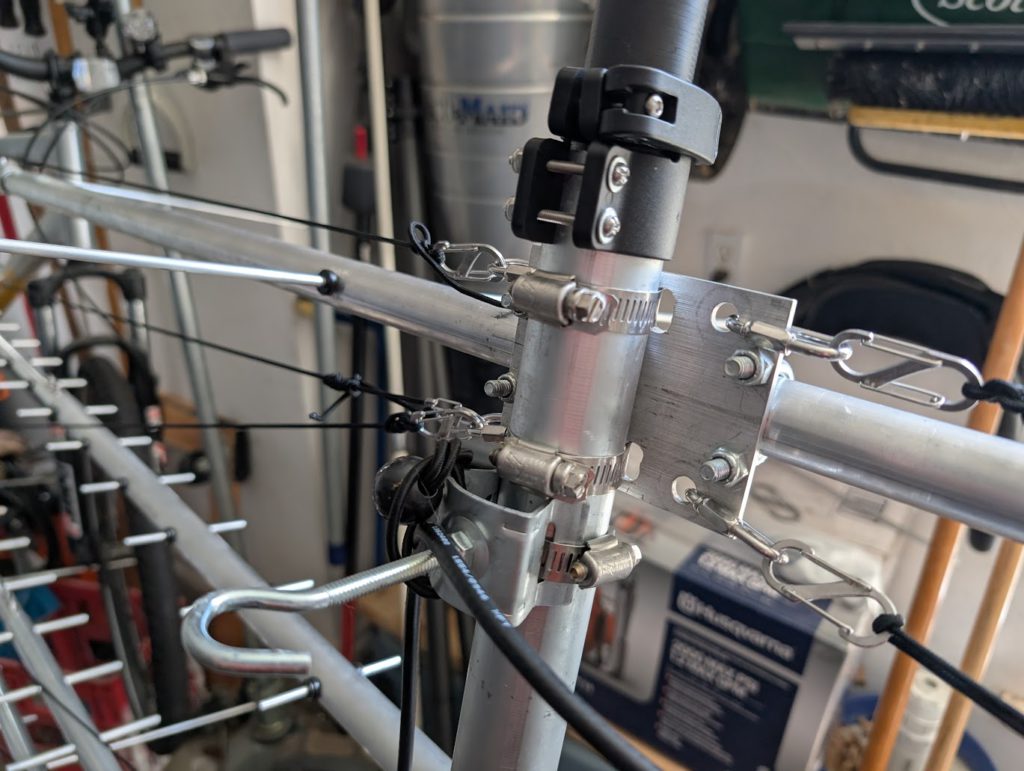
Mast (A Tale of Conduit and Carbon Fiber)
The steel portion of mast is 1-1/4 inch steel electrical conduit. I used this because the telescoping mast fits inside it and the carbon fiber clamp happens to mostly fit onto the steel conduit. The problem with this conduit is that the antenna saddle clamps can deform it and then the telescoping mast is pinched and will not telescope. To solve this problem I had to use a benchtop drill press to drill out the mast mounting plate to allow for hose clamps to replace the saddle clamps.
The telescoping carbon-fiber mast is the DXE-TCFP-33, sans a few sections.
Antenna Tetris: Keeping Everything in Place
To keep the ends of the antennas from bouncing up/down like butterfly wings while going down a bumpy road I employed paracord and tied it around the ends of each antenna and brought it back to the center mast. Without this I fear metal fatigue would cause a serious problem eventually.
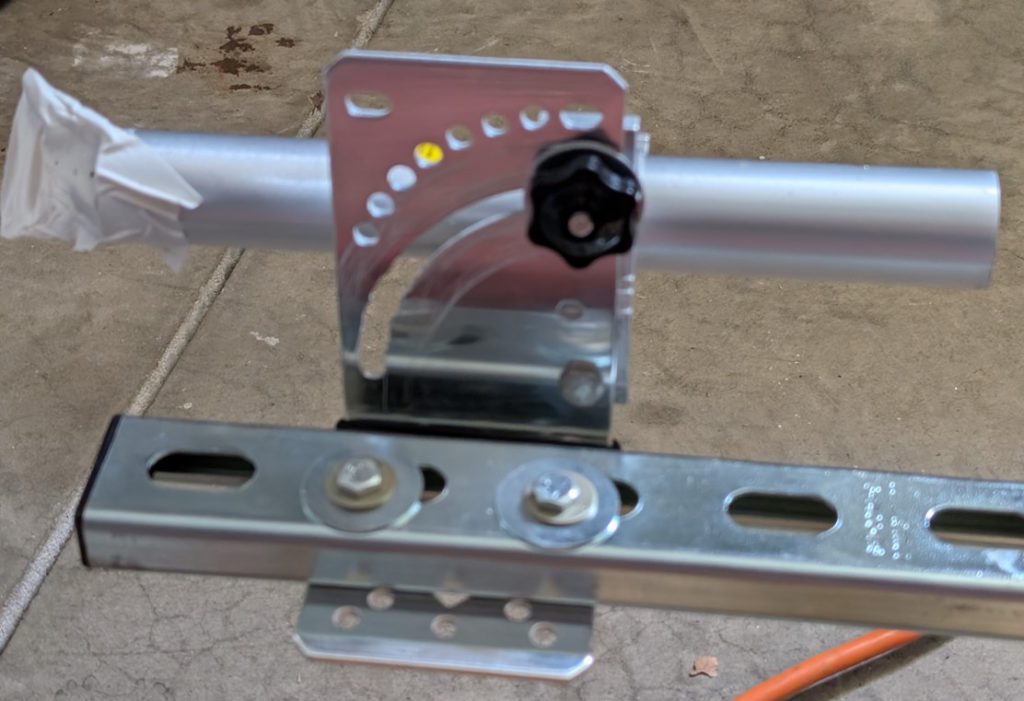
As for the Vertical antennas, I simply used adjustable-angle pole-mount brackets. I had to again use my benchtop drill press to extend the adjustable angle for laying flat. Obviously the verticals cannot be up while the horizontal antennas and antenna mast are being moved.
Cable Chaos: The Real Challenge
To accommodate the telescoping mast and the 6m antenna, I had to build-in a electric cord storage reel. The fine folks at ABR Industries made me a long coax from ABR240-UF with BNC connectors for quick disconnect, roll-out/roll-up, reconnect for this purpose.
For 2025 I switched all coax out and now I’m using ABR Industries ABR240-UF and it’s all ‘custom order’ to fit my car and situation. Most of the connectors are Type N but a few are PL259 and a few are BNC.
I bring the coax in the back passenger window and I use the black rubber tubular pipe insulation between the glass and door frame. This is a lot more flexible than pool noodles and does a much better job sealing up and keeping water out.
I spend a lot of time routing the coax cables though the window and to their ultimate destination and I ping-pong back and forth inside the car, outside the car. The other thing that consumes a huge amount of time is simply all the connections – DC power, coax, USB, A/B switches, GPS receivers, laptop mount, DC/AC inverter, etc. It always shocks me how many hours this consumes. I can have the antennas on the car in about an hour. All the rest takes another 8 or 12 hours. Wireless communications sure requires a lot of wires..
Pointing the thing this way then that way…
The other ‘secret sauce’ is that I’m using the S.A.T. controller to manipulate the antenna rotor controller. I contacted the manufacturer of the S.A.T controller and asked/suggested if they could use it’s built-in GPS receiver to allow me to manually enter a grid square or a callsign to point to using my current position. They loved the idea and integrated it within a month. So now, when I see a fixed station I want to point to, I enter that callsign and it uses my QRZ account to obtain the grid and it rotates! I can also enter Lat/Lon coordinates for it to point to and I can save them and recall them such as “Queen Wilhelmina State Park”. If I know N0LD/R is at Queen Wilhelmina State Park I just click on the saved location and it where to turn to! Awesome!!!
Satellite Mode
When not rovering, I can swap masts and track Amateur Radio Satellites! Here is an image of the N5ZY Rover Roof Rack v2 on wheels ready to pull into the yard for satellite ops. I cannot mount to the roof in this setup because the crossbeam is much wider than the car. Also these antennas are not capable of highway speed.

And now a word about Safety
For starters, every bolt has a nylon lock nut or a star lock washer with a lot of torque. I do not want something falling off my vehicle and striking a motorcyclist or someone’s property.
At every out-of-car stop (bathroom, cheese burger and ev charging, etc) I visually inspect that everything is still tight and I give it a shake test.
With the extendable mast I ensure that at least a foot if not two feet of a section remains inside the previous section when extended. Therefore if a sudden strong gust of wind occurs it hopefully will not snap. Also, I do not extend it in an area where there are electric utility wires within 30 feet or more. I keep my distance!
Ladder safety – I sadly ignore almost all of the rules. I can tell you that a wet ladder, uneven ground and a wet car / roof rack is damn treacherous. Maybe in my next change I will figure out a way to tether the ladder to the rack so it can’t fall one way or the other while i’m trying to maneuver from the roof onto the ladder. Maybe also I will figure out a way to put anti-slip stuff onto the roof rack so my footing doesn’t so easily slide. Seriously, this is dangerous.. it is one thing that is always on my mind.
Verdict
I think I’ve got a very good, usable system (except ladder safety)! When it’s not a contest weekend I can remove it all and return my car to normal duty. The roof rack goes on quick, it’s all the cables and routing them though the back window, over the seat, to the antenna switches that takes a while. This would go drastically faster with a helper (one person in the car and one outside). It would also be easier if I knew someone with stretch arms like “The Incredibles” Pixar characters. Seriously, the rotor is an incredible improvement.